Setting up a makeshift Lab for Embedded Systems at Home
Published:
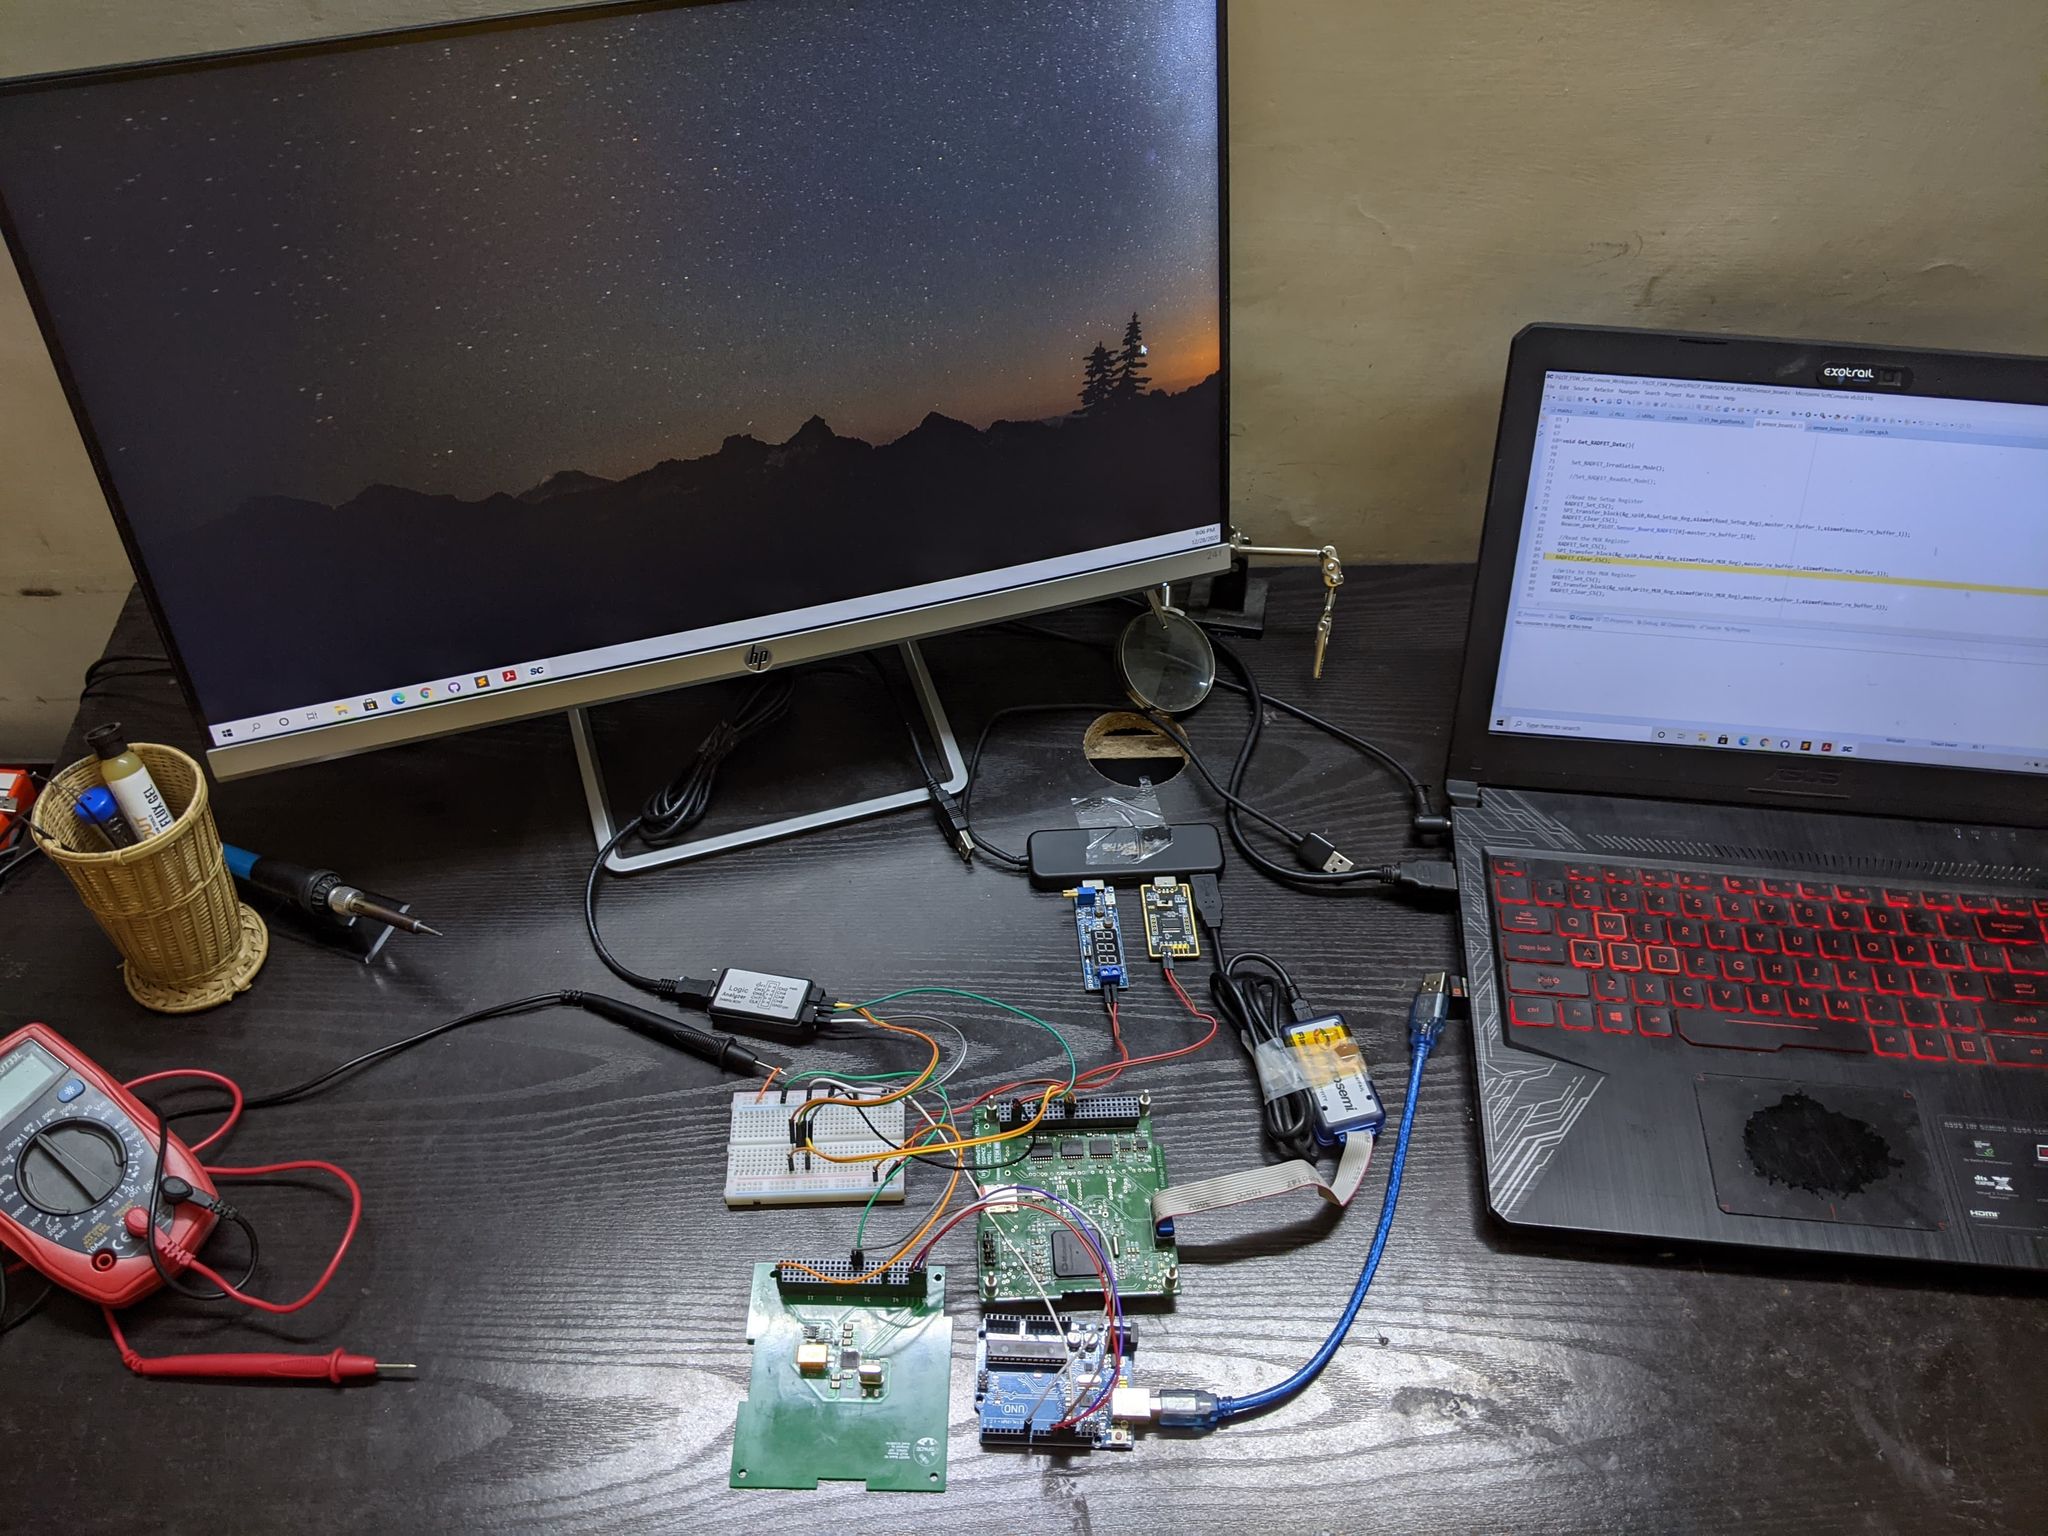
The advantages of working with small satellites and particularly embedded systems are that they do not require a lot of fancy equipment. When the covid pandemic stuck, I was halfway through my final year project, which involved the designing development of a rocket payload. Most of my work was lab-based, as I needed to develop flight software for this payload and test it on the target embedded system which was the onboard computer.
In order to continue my project work, I set up a makeshift lab at my home using low-cost components purchased from amazon. This possed describes my test set up and I have also provided amazon links to the components.
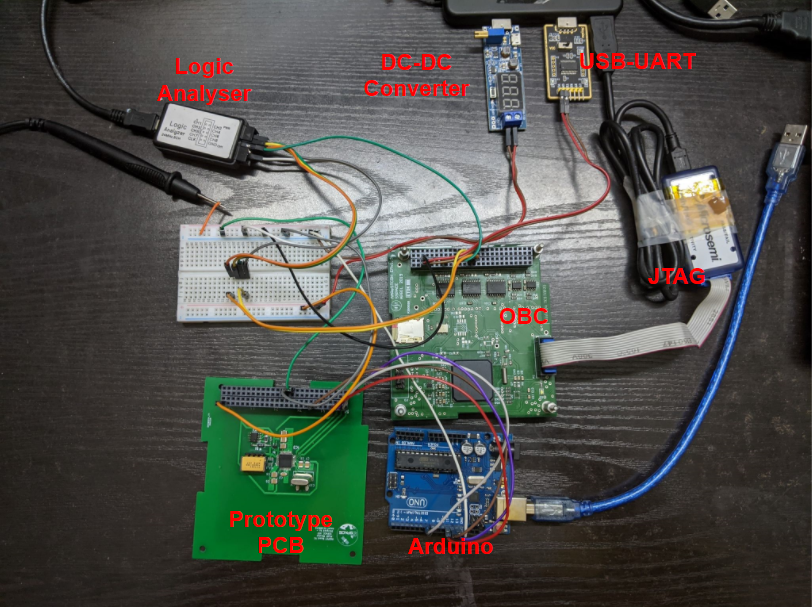
The above picture shows the basic setup consisting of the following.
USB to UART module: This module can be used to log debug information from a target embedded system to a computer. It also has a 5 Volt supply that can be used as a power supply for different devices.
USB dc-dc converter: This module can be used to generate a variable voltage supply from 1 VOLT to 32 VOLT.
Logic analyzer: This can be used to prove any signals and interface protocols such as UART, I2C, SPI, and others.
Voltmeter: A simple tool, but extremely usefull, specially for checking electrical continuity.
Soldering Equipment: Another handy tool is a temperature control solder iron and a simple soldering stand. The soldering setup also contains lots of flux, IPA, and tweezers.